
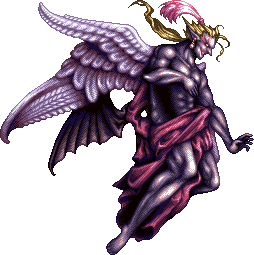
 Dancing Mad Ultimate
 Toolbox/Raidplan
Toolboxes are an interactive guide that allows you to click through each phase individually and review the mechanics in an easy to understand manner.
PoV Videos
Videos covering clears by different roles.
WARNING
These clears may not depict the current PF strats and are for learning purposes only.
Mitigation Plan
By Ikuya Kirishima
IMPORTANT
The mit sheet is NOT intended to be taken as gospel, but rather a general guideline to how you can set up your CDs through the fight. Talk with your party and work out what CD timings you are using together.
Macros
View All Macros
Blackhole Macros
Supports
First in line 
/mk attack1 <me>Second in line 
/mk bind1 <me>Third in line 
/mk ignore1 <me>DPS
First in line
/mk attack2 <me>Second in line
/mk bind2 <me>Third in line
/mk ignore2 <me>Accretions
First in line
/mk attack3 <me>Second in line
/mk bind3 <me>Cheatsheet

Buff Timings

- 1st GCD Kefka Buffs.
- Post Graven 2.
- Forsaken 1st Towers.
- Trines
- BoA Lat/Long
- Blackhole Slap Happy
- End of P3 -> Start of P4
- End of P4
- After the final Tower of Celestriad
- After the final Forsaken Stack

- P1 - Opener
Players can pot in P2 - Trines for prog. This will misalign P3 and P4 pots.
- P3 - Midway through the first Thunder III cast
- P4 - As soon as it's up
- P5 - End of Forsaken
Pot windows are for generic prog and may be changed based on team comp.
Waymarks
These can be imported using an XIV Launcher Plugin.
Diamond Waymarks
{
	"Name": "12y Waymarks",
	"MapID": 1094,
	"A": {"X": 100.0, "Y": 0.0, "Z": 88.0, "ID": 0, "Active": true},
	"B": {"X": 112.0, "Y": 0.0, "Z": 100.0, "ID": 1, "Active": true},
	"C": {"X": 100.0, "Y": 0.0, "Z": 112.0, "ID": 2, "Active": true},
	"D": {"X": 88.0, "Y": 0.0, "Z": 100.0, "ID": 3, "Active": true},
	"One": {"X": 94.0, "Y": 0.0, "Z": 94.0, "ID": 4, "Active": true},
	"Two": {"X": 106.0, "Y": 0.0, "Z": 94.0, "ID": 5, "Active": true},
	"Three": {"X": 106.0, "Y": 0.0, "Z": 106.0, "ID": 6, "Active": true},
	"Four": {"X": 94.0, "Y": 0.0, "Z": 106.0, "ID": 7, "Active": true}
}
Fight Writeup
WARNING
These strats are still being changed. Some sections may change as strategies develop.
PHASE 1 REQUIREMENTS
Throughout Phase 1, 3 conditions must be met to successfully complete Phase 2 later in the fight:
- Utilize all Double-Trouble Trap
 debuffs without letting them fall off.
 - Successfully soak all the gravity bubbles in Graven Image II
- Place and utilize all 16 arrow debuffs in Tele-Trouncing
Solving these "puzzles" will be included in the guide. Kefka will change voicelines throughout the Phase as conditions are met. Notably, upon completion of Phase 1 Kefka's voice line will change to "Intriguing. This clearly isn't your first time..." if all 3 conditions are met.
Failing to meet these conditions will cause Kefka to "die" at the end of Phase 2, resulting in a fake clear that forces the players to leave the instance.
In addition, a lot of the mechanics in this fight will cause Damage Down  if solved incorrectly. This debuff reduces your damage by about 90% for 3 minutes. It is common practice to wall IF IT IS SAFE TO DO SO, as the damage loss from resurrection weakness is less than damage down.
Phase 1: Kefka
Kefka will begin the fight with Revolting Ruin III, a hard-hitting conal tank buster that cleaves twice. The 2nd hit will target the player with the 2nd highest enmity.
Graven Image
Kefka will then cast Graven Image, and the Statue will tether all 4 players of a role (i.e. supports/DPS). This tether will cause the player to be knocked back from the statue by roughly half the arena's width.
Kefka will then cast Mystery Magic, telegraphing:
- Ice Quadrant Cleaves
- Stack or Spread markers
- Red and Blue rings on Kefka
The red ring corresponds to the players' overhead markers. The blue ring corresponds to the floor cleaves.
On these rings are 2 orbs. If these orbs have a ? symbol inside them the players must resolve the opposite of what is indicated:
- Stack + ? = Spread
- Spread + ? = Stack
Both mechanics can be "fake" at the same time.
To resolve this, have:
- DPS -> East quadrants
- Support -> West quadrants
Tethered players will have to ride their KB just before the mechanic resolves, so if they have to take a Northern quadrant they should move as far North as possible.
After Mystery Magic, the Statue will target:
- 2 DPS
- 2 Supports
These players will be shot with a laser, inflicting them with a Magic Vulnerability Up  , as well as spawning a tower underneath them.
All players will line up a conga-line as shown in the image below (see toolbox for now).
After the lasers go off the non-laser players will soak the towers.
During the lineup, Kefka casts Double-Trouble Trap.
A 4 person enumeration stack that knocks players back.
This will target one player from each role:
- Debuffed player will stand at max-melee.
- Players of the same role stand on the boss hitbox.
Upon expiring, the debuff will transfer to another random non-debuff player that was hit, propagating 3 times total:
- 3s
- 80s
- 50s
Just before the knockback resolves, Kefka will begin to cast another Mystery Magic, telegraphing:
- Ice Quadrant Cleaves
- Parallel Lightning AOEs
Simply look at the rings on Kefka, and determine which ones are fake to find the corresponding safespot after the knockback.
Kefka will then raise the platform before casting a Light of Judgement raid-wide and a Hyperdrive tankbuster that hits 3 times.
Afterwards, Kefka will cast Graven Image again.
Graven Image II
Each role will either be tethered to the right (yellow) or the left (purple) of the statue.
Yellow Statue:
- Point-blank AOE on the player.
Purple Statue:
- Low-damage stack that leaves a bubble on the floor.
Spread players cannot place their spreads close to the bubbles as it will cause them to explode and wipe the raid. Hitting another player with this spread will cause them to be knocked off the arena.
Kefka will telegraph another fake/real ice quadrant cleave.
The whole party will stack North of Kefka at max-melee. Once the cast finishes:
- All players will step out in the direction of their light parties:
- LP1 -> True West - LP2 -> True East
- Spread players move along the West/East cardinals.
After the first spreads resolve, Kefka will cast another Revolting Ruin III:
- Tank takes this North
- Party stacks South
The statue will then indicate and resolve an East/West cleave before tethering everyone again. These tethers are solved by having the party stack South at max-melee. The spreads are resolved the same as the first time.
As the last spread resolves the Statue will indicate another East/West cleave.
Because the 2nd Double-Trouble Trap is coming up, all Support players will stack inside Kefka's hitbox to the North, and DPS South. The debuff player should stand behind their group to launch each light party into the bubbles to soak them. Each debuff player will have to manually join the stack closest to them.
NOTE
The soak window for the bubbles is quite small. They cannot be soaked outside of the window just after the KB goes off. This is signified by the bubbles flashing gold.
Kefka will raise the platform once more, followed by another Light of Judgement / Hyperdrive combo.
Tele-Trouncing/Graven Image III
Kefka will assign each player with 2 Tele-portent  debuffs:
- One short timer (7s)
- One long timer (10s).
These debuffs will place a teleport pad on the floor that is based on True North, meaning the arrow direction is always relative to the arena, not the player.
If 2 arrows are placed on each other they will cancel out.
One role will get mixed arrows  , whilst the other role gets 2 identical arrows .
All identical arrow players should move to the cardinal that results in their arrows making a "counter-clockwise" pattern with the other arrows, as seen below.
All mixed debuff players will have to place their arrows in such a way to form an "L" shape that will cause a player to move into the identical arrow player's teleport pads.
Players can use the waymarks to line up their arrows correctly.
NOTE
To simplify this for mixed debuff players, North (Up) + West (left) arrows -> Place arrows North-West
Once again we will resolve the Double-Trouble Trap by having the Support players take their knockback from the North, and the DPS South.
The Statue will then tether each role separately once more. Left (yellow) will inflict each player with a confused  debuff and right (purple) will inflict each player with a small AOE and a sleep
  debuff.
To resolve this we use the static positions shown below. This allows us to ignore the tethers and preposition, resolving the mechanic correctly regardless of which role is picked for the confused debuff.

After the arrows are resolved, Kefka will cast one more Mystery Magic, telegraphing the same lightning AOEs as before and spread/stack markers on each role group. In addition, the Statue will also cast a real/fake gaze.
Support players will stack/spread North of Kefka, and the DPS players will stack/spread South of Kefka.
If Kefka is below 15% HP at this point he will then transition to Phase 2.
If above 15%, Kefka will then become untargetable and cast a final Light of Judgement that wipes the raid.
Phase 2: Forsaken Kefka
Kefka will lower down from the sky and begin the phase by casting Ultimate Embrace a shared tankbuster. This is followed by a hard-hitting raidwide:
Forsaken
NOTE
This mechanic is quite dense when learning it for the first time. In addition the positioning (particularly for cone baiters) is incredibly tight. I recommend watching plenty of videos and debugging wipes to determine positioning errors.
As the cast finishes, each role will be assigned either AOEs or Cones (which are baited on the closest player). One player from each role will also be assigned a 3-Person Enumeration Stack.
Each player will also be inflicted with 4 stacks of Spells' Trouble. Every time a player resolves their assigned mechanic a stack is removed. Failure to remove all stacks by the final Light of Judgement raidwide will deal lethal damage to the player.
Kefka will then place 2 meteor towers on the floor adjacent to each other. These will be treated as relative South. We will also designate these towers for specific mechanics such that the relative West tower is for cone players and the relative East is for AOE players.
When a player enters a tower, the tower resolves their current mechanic and assigns them a new mechanic for a later tower.
Kefka will cycle through 8 sets of these towers, allowing 2 sets of 2 players to resolve their debuffs each time.
- Every odd (EXCEPT 7) set of towers will give the 4 people that soaked them 2 cones, and 2 AOE debuffs to be activated later.
- Every even (EXCEPT 8) set of towers will give the 4 people that soaked them 2 stacks, 1 cone, and 1 AOE debuff to be activated later.
After every odd set of towers Kefka will cast either Future's End (a front facing half room cleave) or Past's End (a rear facing half room cleave). This will cause large AOEs to hit the 4 closest players, placing Kefka clones about halfway between the player and the real Kefka. Kefka will then cast All Things Ending, aiming all the clones at a random player.
Prio
To resolve who takes specific towers we use the assigned mechanics to form new groups.
Group A will incorporate both light party pairs that the stack belongs to. (I.e. if H1 and D4 have the stack, then H1/MT and D2/D4 all belong to Group A)
Group B will incorporate the remaining non-stack pairs.
Within these groups players may have to adjust to one another as they have the same mechanics. The prio is:
- Left <- Support Support DPS DPS -> Right
- Left <- Ranged Melee Melee Ranged -> Right
Because cones are baited on the West/East, we can assume that cones are always baited by ranged players.
Each group will have to soak different sets of towers. Because the last 2 sets of towers do not give debuffs, we have to split up Group A's soaks.
- AAA BBBB A
During the forsaken raid-wide the group will position themselves like so to quickly determine what group they belong to:

As the Dragoon I can immediately see that myself and my partner are AOE players, therefore we are Group B.
Because each tower reassigns mechanics to players, we will quickly see a situation where two players of a pair are assigned the same mechanic.
To solve this we use the aforementioned prio system, where the melee player of each pair will swap tower if they have the same debuff as their partner.
For example, if both myself and my partner are assigned cone after the first tower, I will take the relative Wast cone position for the next set.
First Towers
AAA BBBB A
The first set of towers will be resolved by all Group A members: both stack players, one cone and one AOE player.
For an example we will use what I stated prior: H1 and D4 have the stack.
Using our priority system, H1 will take the relative West soak, and D4 will take the relative East.
The cone/stack player will then stand at the back of the tower (relative to Kefka) that they were assigned to as stated earlier (cone left, AOE right)
NOTE
The West stack player (a support for the first set of towers) will need to stand slightly north of the middle of the tower. The cone must also stand slightly away from the wall to ensure they are caught in the stack without pointing their cone at them.
Group B will have their Healer bait the cone south by standing next to the tower. The Tank will fulfil the West Enumeration stack by standing to the relative North.
The remaining DPS in Group B will then fulfil the East Enumeration stack by standing to the South West of the East tower.
Positioning correctly will resolve the first set of towers.
Second Towers
AAA BBBB A
The second set will also be resolved by Group A as stated in the order above. Because this is an even tower it will be resolved with the 2 cones and 2 AOEs that were distributed to Group A from the first towers.
Because the mechanics are distributed randomly, players must look at their partner to determine where they will position themselves.
The AOE players will stand at the rear of their towers away from Kefka, whilst the cone players will stand at the front inside Kefka's hitbox to bait Kefka's clone.
Group B players will have both melee players at the North and inside Kefka's hitbox to bait the other 2 Kefka clones, whilst both ranged players will bait their respective cones.
WARNING
The cone players here must be precise with their positioning to ensure they aren't baiting a Kefka clone and are still able to bait the cone AOE.
After the towers resolve, the party will immediately stack either between the next set of towers (Past's End) or opposite of them (Future's End) on the corresponding waymark. Once Kefka begins to cast All Things Ending the party can move to resolve the Third Towers with the mechanics they received from the Second Towers.
Fourth Towers and onwards
AAA BBBB A
After the Third Towers, Group B will take over tower duty. They will have had to remember their mechanics that were assigned at the very beginning of the mechanic.
Likewise, Group A will have to remember the mechanics that the Third Towers assigned all the way until the Eighth Towers.
After the final set of towers the party will stack on the A Waymark to bait one last Past's/Future's End.
Kefka will then cast a Light of Judgement raidwide. This will deal lethal damage to any player who still has stacks of Spells' Trouble.
Trine
The party will move to stand under Kefka as triangles begin to float down from the sky in sets of 3. The 1st and 3rd set will have 3 triangles and the 2nd set will have 1. The 3rd set will always cover the center of the arena.
These triangles will explode on the points in large circular AOEs.
Whilst the 3rd set is landing Kefka will cast Wings of Destruction and one of his wings will glow, indicating a half-room cleave. Simply step to the non-glowing side to avoid this.
To resolve the Trines, we have the party look North and take the first safespot clockwise around the arena.
The Tanks will instead look North-West and take the first safespot counter-clockwise. This is because as the 1st set of Trines resolve, Kefka will cast another Wings of Destruction. However this time it will be a tankbuster baited on the closest and furthest player from Kefka.
TANK
Determine with your Tank partner if you are baiting the near or far tankbuster.
The far tank will go to the edge of the arena, and the near tank will stand between 2 of the circular AOEs originating from the triangle's points.
DAMAGE
Melee players should be extremely careful and NOT greed uptime to allow the tankbuster to bait correctly onto the tank.
After a final Ultimate Embrace shared tankbuster, if Kefka is not brought to 0% HP he will become untargetable and Enrage.
Phase 3: Chaos & Exdeath
After the Cutscene, Kefka will appear untargetable and cast Definition of Insanity, summoning Chaos & Exdeath.
They both will immediately cast The Decisive Battle. This will assign the 2 closest DPS/Supports Epic Hero  or Fated Hero
  .
.
- Epic Hero
Afflicted players can only hit Chaos
- Fated Hero
Afflicted players can only hit Exdeath
In general:
- MT, H2 (if Scholar), D1, and D2 should target Chaos.
- ST, H1, D3, and D4 should target Exdeath.
Chaos will then cast Bowels of Agony.
Bowels of Agony
This mechanic will apply 4 different debuffs to members of the party:
- 1 DPS and 1 Support will receive Entropy
 .
. Upon expiring the player will have a small AOE go off on them.
- 1 DPS and 1 Support will receive Dynamic Fluid
 .
. Upon expiring the player will have a donut AOE go off on them.
- Every player will receive Tailwind
 or Headwind
  .
. These can be cleansed by getting hit by a KB. The player can reduce the KB by either facing TOWARD (Tailwind
) or AWAY (Headwind ) from the KB depending on the debuff.
Entropy and Dynamic Fluid can be either short (18s) or long (45s), so it is important for melees to determine which one is resolving first.
Coloured crystals will then spawn, with a Fire and Water Crystal spawning on opposite edges of the arena, with a Wind crystal between them.
The Wind crystal will be treated as relative North.
These crystals will activate when different debuffs expire/are cleansed.
The Fire crystal will activate per stack of Entropy
that expires. This will launch a donut AOE at the closest players.The Water crystal will activate per stack of Dynamic Fluid
that expires. This will launch an AOE at the closest players.
NOTE
The fire and water crystal AOEs also knock players away, resolving their wind debuffs. However, because we use the LB3 strat we can safely ignore this.
- The Wind crystal will activate per Tailwind /Headwind debuff cleansed. This will launch a pair stack at each player with a debuff.
Exdeath should be kept in the center of the arena, as he will soon cast Thunder III: a massive AOE.
During this cast the Epic Hero / Fated Hero debuffs will be removed.
After the cast begins, the ExDeath Tank should run to relative North.
PLAYER POSITIONING
All ranged players will use the static positions found in the toolbox to resolve the crystal AOEs efficiently. These positions allow ranged players to safely ignore most positioning requirements.
Melee players should use spread positions when Entropy is resolving, and stack on the Wind crystal when Dynamic Fluid is resolving.
WARNING
Melee players should be very careful especially during Entropy expirations. If they are not quick to squeeze closer to Chaos they can easily be clipped by the fire donut and killed by the knockback.
After the first debuff resolves, Exdeath will cast another Thunder III, this time being a proximity baited two-hit tankbuster. This can either be swapped or invulned.
Both bosses should then be stacked onto the Wind crystal at relative North.
The tank should keep Chaos pointed towards relative North crystal as he casts either Longitudinal/Latitudinal Implosion:
- Longitudinal = Sides safe first then Front/Back
- Latitudinal = Front/Back safe first then Sides
Immediately after the second cleave the 2nd set of debuffs will resolve. These can be resolved in the exact same manner as the first.
Chaos will then cast Umbra Smash.
Targeted jump on the furthest player that inflicts flare damage to the rest of the party.
D3 will run to the relative South wall to bait this.
At the same time, Kefka will perform 8 dashes through the arena, either clockwise or counter-clockwise. Note which waymark he dashes to first, and which direction he is travelling.
Exdeath will then cast Vacuum Wave, a KB centered on himself. All players stack in front of him. Do NOT anti-KB as this will result in the wind debuff not being cleansed.
WARNING
All players should swap to targeting Exdeath here. Because Chaos jumps just before the Vacuum Wave cast finishes, it can cause the player to quickly turn around, resulting in their Tailwind or Headwind being unresolved.
For this strat to work you must tank LB3 to avoid overkill to the wind crystal pair stacks. As each pair stack inflicts a Wind Resistance Down II  debuff.
TANK
The timing for LB3 is to press it on the "W" of Vacuum Wave.
Ultima Blaster
Each player will then be marked 1-8 with Limit Cut markers.
Noting the direction and waymark from Kefka before, everyone should place themselves between each waymark in the opposite direction of his rotation, counting up from 1-8.
For example if he dashed to East (the B waymark) and then rotated clockwise, the 1 player would go between 2 & B, the 2 player between A & 2 and so forth.
After this resolves Exdeath will cast another proximity baited Thunder III buster before both Chaos and Exdeath cast another The Decisive Battle.
We will resolve this by using the same groups as the first Decisive Battle.
Exdeath will cast another Thunder III buster before Kefka casts Max, creating a large version of himself. At the same time, Chaos will cast Earthquake.
Earthquake
HEALER
The following mechanics are incredibly tough on healers. I recommend looking at mit sheets and watching videos to get an idea of how to heal the following.
Earthquake places an Earth crystal in the center of the arena, as well as reducing all players' health to 1 and inflicting:
- Primordial Crust
 to all players.
Cleansed by "dying" (taking lethal damage).
1/2/3 debuffs indicating the shortest debuff and cleanse orders. (
x3, x3, x2)Accretion
 to a random healer and a random DPS.
Cleansed by healing the player to full HP.
Letting debuffs expire will instantly kill the affected player.
All players should mark themselves using the macros provided through the raidplan, and at the top of the page.
The Earth crystal will pulse and inflict Earth Resistance Down II  any time an earth debuff is cleansed. This means that healers must heal up each Accretion player one by one.
Big Kefka will then move to a random spot on the edge of the arena and cast Slap Happy.
Looking at Kefka, players will dodge to the opposite side that he raises his hand from.
- If the players dodge right of Kefka, the party will take a stack from Chaos.
- If the players dodge left of Kefka, the party will split into tank/healer/DPS role groups for 3 stacks.
Exdeath will then cast Blackhole.
Blackhole
NOTE
This mechanic is quite dense and can be confusing. Players can (and should) use self-mark macros to assist with positioning and which blackhole they should take.
In the following explanation I will refer to the markers in the macros section.
Blackholes will spawn around the arena and will continue to spawn throughout the mechanic. Stepping into these will cause damage and inflict the player with a Damage Down .
Some blackholes will spawn a tether that can be grabbed/passed. These tethers will shoot the tethered player with a laser that should be pointed away from the party.
Tether players can pull their tether clockwise to avoid cleaving the party and still keep uptime. The remaining members of the party should stack in the middle.
Taking 3 of these tethers will deal lethal damage, and thus cleansing that player's Primordial Crust debuff.
Because the blackhole tethers spawn in sets, the party will use the 1/2/3 debuffs assigned previously to determine which tether they are taking.
TETHER PATTERN
The tethers spawn in this repeating order:
- 1 tether → 2 tethers → 3 tethers (×3 sets) → 3 tethers (×3 sets) → 2 tethers → 1 tether
For 1 tether: The 1 Attack marker player takes it.
For 2 tethers: The 1 Attack marker will move counter-clockwise from their 1st tether to take the 2nd. The 2 Attack marker will take the remaining tether (it will spawn opposite the 1st tether).
After another Thunder III tankbuster during the 2 tethers, Kefka will teleport to a random cardinal/intercardinal on the edge of the arena. Players should stand behind Chaos on a southern intercardinal relative to Kefka. This is to bait an upcoming Damning Edict: a half-room cleave from Chaos that is baited on a random player. At the same time as this Cleave Kefka will cast another Slap Happy.
WARNING
In practice it's hard to bait this Damning Edict. Even if it is entirely covering the safe side of Slap Happy it is still possible to dodge both, the timing will just be tighter.
Slap Happy can then be resolved the same as the first, with players avoiding the Damning Edict as necessary.
The next set of Blackhole Tethers will then spawn:
All Attack marker players will move out for this set. Using where Kefka just was as our north, 1/2/3 will take each tether clockwise.
After each laser, the Bind player can take over their respective tether: 1 Bind taking 1 Attack's tether after the first shot, 2 Bind taking 2 Attack's tether after the second shot, etc.
After these tethers are resolved, players will have to bait another Damning Edict relative to Kefka. Kefka will then cast Look Upon Me & Despair a hot tail style line cleave through the cardinal/intercardinal Kefka is on. This is immediately followed by another Thunder III tankbuster.
After another set of Blackhole Tethers the tank should point Chaos toward an intercardinal adjacent to Big Kefka after he teleports. This is to bait another Latitudinal/Longitudinal Cleave so that there are safe spots for Kefka's upcoming Slap Happy
At the same time, Exdeath will cast White Hole. All players need to be topped up to 100% HP. If they aren't by the time the cast finishes they will be killed.
Note
DPS players should use personals here to help alleviate some healer strain.
The final set of Blackhole Tethers will be resolved similar to the first set: two tethers then one tether.
At the same time, Kefka will cast another Look Upon Me & Despair. Simply watch Kefka and move out of the way.
By this point all players should have cleansed their Primordial Crust debuff.
Stomp-a-Mole
Following Kefka's body slam he will stand up. We will use the direction he fell from as relative North. Supports will stand relative North (Kefka's Heels) and DPS relative South (Kefka's Toes) to bait blizzard puddles.
Chaos will then cast Knock Down, targeting a random player with a stack.
Immediately after the puddles drop each stack will split into light party pairs with LP1 going relative West and LP2 going relative East
After another set of puddles, the stack role will stack center and the remaining players will stand relative West and East to resolve 2-person enumeration towers.
After the stack resolves the party will swap positions, using their light parties to determine which side they go to.
Chaos will then cast Big Bang, making the area that the stacks were taken unsafe. Exdeath will also cast Blizzard III, freezing any players who aren't moving.
Finally, Exdeath and Chaos will begin to enrage.
Chaos should be killed first as when he starts his enrage cast Bowels of Agony, both bosses will become untargetable.
Either when Bowels of Agony is cast, or when Chaos dies, Exdeath will cast his Enrage Meteor.
Killing both Chaos and Exdeath will transition the party to:
Phase 4: Kefka Says
WARNING
This phase requires a lot of memorisation. Using echo macros is highly recommended.
As the phase begins, Kefka will cast Kefka Says, spawning Chaos (North-West) and Neo-Exdeath (North-East) at the edge of the arena.
Kefka will then cast Mystery Magic 3 times in succession. This works identically to phase 1: simply determine the safe spots and move into them.
The catch here is that during these dodges Chaos and Exdeath will cast and apply debuffs to players. These casts can be real or fake.
Grand Cross 1/2
Exdeath will cast Grand Cross three times, the first two assigning the following debuffs:
| Debuff | Real | Fake |
|---|---|---|
Compressed Water  | 3 Player Stack | Spread |
Forked Lightning  | Spread | 3 Player Stack |
Acceleration Bomb  | Stillness | Motion |
Cursed Shriek  | Gaze | Inverted Gaze |
Debuff Assignment
The above will be assigned in 2 sets across both Grand Cross casts:
Compressed Water and Forked Lightning can be either short (35s/50s) or long (1m+) during the first Grand Cross cast. The second Grand Cross will be the opposite.
Acceleration Bomb will apply 2 short / 2 long debuffs with each cast. Because these are split across both casts, players will need to remember the real/fake status of their Acceleration Bomb when it was applied.
Cursed Shriek will resolve sequentially (Whichever was applied first will go off first).
The first Grand Cross will apply:
- 1 Support 1 DPS with short gaze
- 1 Support 1 DPS with stack (short/long)
- 1 Support 1 DPS with spread (short/long)
- 2 Support 2 DPS with short stillness (mixed short/long)
The second Grand Cross will apply:
- 1 Support 1 DPS with long gaze
- 1 Support 1 DPS with stack (opposite of first cast)
- 1 Support 1 DPS with spread (opposite of first cast)
- 2 Support 2 DPS with long stillness (mixed short/long)
All of these may be real or fake
This can lead to the following sequence:
- Fake Grand Cross 2, Short (2 Real/2 Fake Stillness)
- Real Gaze
- Real Grand Cross 1, Long (2 Real/2 Fake Stillness)
- Fake Gaze
Grand Cross 3
The third Grand Cross cast assigns all players:
- White Wound
 or Black Wound
- Allagan Field
 or Beyond Death
| Debuff | Resolution |
|---|---|
| Allagan Field | Stand in the opposite colour to your / |
| Beyond Death | Stand in the same colour as your / |
Chaos Debuffs
| Debuff | Real | Fake |
|---|---|---|
| Entropy | Delayed AoE (twister) | Delayed Donut |
| Dynamic Fluid | Delayed Donut | Delayed AoE (twister) |
Inferno/Tsunami can be cast in any order, but Inferno will always resolve first.
Flood of Naught
Exdeath will jump to a random cardinal/intercardinal and cast Flood of Naught. This cast can also be fake.
This will telegraph half room cleaves of either blue ()/ purple ().
WARNING
These halfroom cleaves overlap. Do not stand in the middle.
Normally, players would have to get hit by the opposite colour cleave as their White Wound / Black Wound debuff. However, players will also have to resolve their Allagan Field / Beyond Death debuff at the same time (See table above).
TIP
Interestingly, even though Grand Cross 3 can be fake we can always treat our debuffs as real. If I have I must get hit by purple. However with a reverse cast I have -> I must get hit by purple.
Therefore we only really have to check our debuffs and swap sides if the actual Flood of Naught cast is fake.
Resolution Examples
| Wound | Field/Death | Flood of Naught Cast | Action |
|---|---|---|---|
| | Real | Get hit by purple |
| (Fake) | (Fake) | Fake | Get hit by purple |
| (Fake) | (Fake) | Real | Get hit by blue |
| (Fake) | (Fake) | Real | Get hit by blue |
| | Fake | Get hit by purple |
Debuff Resolution
Using True North the 1st of stack/spreads will resolve.
There will be a Support and DPS stack, and a Support and DPS spread:
- Support Stack -> North
- DPS Stack -> South
- Support Spread -> West
- DPS Spread -> East
Additionally, 4 players will resolve their Stillness/Motion debuff at the same time.
(check raidplan for image, will get one here eventually)
Kefka will then cast Thrumming Thunder III.
NOTE
Remember whether this cast is real or fake for Mana Release.
At the same time, the 1st set of Gazes will resolve. Both gaze players will stand under Kefka:
- Real Gaze -> Entire party looks away from Kefka
- Fake Gaze -> Entire party looks at Kefka
All players should then stack middle to resolve the Entropy debuff.
- Entropy is real -> Party immediately moves out to avoid the twister.
- Entropy is fake -> Stay middle until the donut goes off.
Kefka will cast Ultima Upsurge, a heavy-hitting raidwide.
WARNING
If the party is resolving a fake Entropy , there is a bright flash from Ultima Upsurge before the donut resolves. Make sure to wait for the donut before moving out.
The party will then move to solve the 2nd set of stack/spreads in the same manner as the first.
At the same time, Kefka will cast Blizzard III Blowout.
NOTE
Remember whether this cast is real or fake for Mana Release.
The 2nd set of Gazes will then resolve in the same manner as the first.
The party will then stack under Kefka to resolve the Dynamic Fluid debuff.
- Dynamic Fluid is real → Stay middle until the donut goes off.
- Dynamic Fluid is fake -> Party immediately moves out to avoid the twister
At the same time, Kefka will cast Mana Release, telegraphing another Ice/Lightning combo.
For Mana Release, determine if the corresponding cast previously was real or fake, then apply that same real/fake status to Mana Release:
- Thrumming Thunder III -> Overrides lightning
- Blizzard III Blowout -> Overrides ice
How overriding works
- Previous component real -> Use Mana release's corresponding component
- Previous component fake -> Flip Mana release's corresponding component
Simply find that safespot that avoids both resolved component simultaneously.
Examples
| Thunder III | Blizzard III | Mana Release Lightning/Ice | Resolution |
|---|---|---|---|
| Real | Fake | Real / Real | Stand in Ice |
| Fake | Real | Fake / Real | Dodge both |
| Fake | Fake | Fake / Fake | Dodge Both |
| Real | Real | Real / Fake | Stand in Ice |
The party will have to bring Kefka below 25% HP before he casts his final Ultima Upsurge to successfully complete the phase.
Phase 5: Ultima Kefka
After a short transition, Kefka will cast Ultima Repeater, a raid-wide that hits 4 times.
The party should stack in role-based groups:
- Tanks -> North
- Healers -> South-West
- DPS -> South-East
Kefka will then target each role group with a Fell Forces auto-attack 3 times.
Kefka will then cast Flood:
Chaotic Flood
Kefka will telegraph 2 line cleaves diagonally across the arena. These will then rotate either clockwise or counter-clockwise.
To resolve this, players simply find the 2 cardinal waymarks that are free from the first telegraphed cleave. As the telegraphs rotate, 1 of those 2 waymarks will remain free for the second cleave. This will be the party's start position.
Once the first cleave hits, the party steps into the line AOE adjacent to them, then continues stepping into each new adjacent AOE as the cleaves rotate.
As the party rotates they will take 4 party stacks.
This is immediately followed by Maddening Orchestra:
Maddening Orchestra
The party will spread to clockspots adjacent to their role-stacks, with Supports occupying N/W and DPS S/E:
- Tanks -> North
- Healers -> West
- Ranged -> East
- Melee -> South
On these cardinals, light-party 1 players will spread clockwise and light-party 2 players counter-clockwise.
Kefka will then randomly strike 3 non-tank players with a holy AOE, inflicting Magic Vulnerability Up . Both Tanks will be hit with a Flare tank-buster and then be assigned one each of:
- Surprise Flare

A defamation style tankbuster that targets the player with the highest enmity.
- Surprise Holy

A single-target AOE tankbuster that targets the player with the second highest enmity.
TANK
As of the current mit sheet, the Surprise Holy tank will invuln their buster. This allows them to:
- Stand in the Surprise Flare tank's defamation
- Take the following two Fell Forces autos solo
After the initial first set, a second set of holy AOEs will be baited on the closest 3 players to Kefka. The 3 non-tank players who were not hit simply stand in Kefka's hitbox on the E/S/W cardinals.
At the same time, the Tanks will take a shared tank-buster at the North.
Immediately following the 2nd hit, all non-tank players will move South, and the Surprise Flare tank will move North to the edge of the arena to resolve their defamation.
Following this, Kefka will do another 2 Fell Forces auto-attacks before casting Celestriad:
Celestriad
The following debuffs are each distributed to 2 players, leaving 2 players with no debuff:
- Lightning Resistance Down II

- Ice Resistance Down II

- Fire Resistance Down II

Kefka will surround himself with 9 towers:
- 3 Lightning (yellow) towers
- 3 Fire (red) towers
- 3 Ice (blue) towers
With each set of Celestriad, 4 towers will light up. One element will have 2 towers. Players soak the 1st glowing tower clockwise from their vuln:
EXAMPLE
If I have Fire Resistance Down II , then I will soak the first glowing tower in the Ice towers.
(using slide 13 of the raidplan until I make an image)
Non-debuff players will soak the 2nd clockwise tower of the element with 2 glowing towers.
This will continue for a total of 3 sets.
During the 1st and 3rd soaks, Kefka will imbue his staff with either of the following:
Earth
Large AOE -> Players must be at max-melee/on the far edge of their towers
Wind
Large donut AOE -> Players must be on the inside edge of their towers
After the final soak, Kefka will cast another Ultima Repeater, followed by 3 more Fell Forces auto-attacks.
Kefka will then cast Stray Apocalypse:
Stray Apocalypse (Exas)
Kefka telegraphs 2 Exaflares on the North-East / North-West intercardinal, alternating between the two.
This can be dodged by standing between the first set of Exaflares, then strafe to the gap in the next set as it appears.
After 6 sets, Kefka casts Stray Entropy, hitting every player with an AOE. Simply spread around the arena to avoid this.
Kefka follows this with another Maddening Orchestra and 3 Fell Forces auto-attack.
The entire party will then stack South-East as Kefka casts Forsaken:
Forsaken
IMPORTANT
Players must be careful with any movement or movement related abilities during this mechanic. If you are hit by an orange AOE telegraph or step into a blackhole your character is removed from the raid. You CANNOT be resurrected from this.
Kefka will spawn blackholes throughout the mechanic. They will spawn in the following order:
- Mid + Intercardinal
- 2 x Intercardinal
- Intercardinal + Cardinal
- 2 x Intercardinal
Large orange AOEs will also bait on the closest intercardinal/cardinal to a random player.
At the same time, Kefka will place a stack marker on the party. Players must wait for the orange AOE to appear before moving. Moving too early can result in baiting the AOE incorrectly and wiping the raid.
The movement provided ensures that there will never be variation in dodges:
- C -> 4 -> 1 -> 2 -> 3
WARNING
Players should aim to stay just past the waymark that they arrive at after dodging the AOE.
This is to ensure that the next AOE cannot be placed in unpredictable positions, and allow the party to dodge the mechanic with no issues.
Kefka will then finally cast his enrage: Forsaken Null