

 The Baldesion Arsenal
 Baldesion Arsenal Overview
The Baldesion Arsenal is the only raid available within The Forbidden Land, Eureka, introduced in Stormblood. The raid features multiple bosses and small-scale encounters, requiring a large group of players with good coordination to complete. The raid is designed for up to 56 players but can be entered with undersized parties should they still meet the entry requirements.
Entry to The Baldesion Arsenal is located within The Forbidden Land: Eureka Hydatos and will require completing several prerequisites before players can enter the raid.
Read on for more information about Eureka, or click below to jump to the Raid Guide.
Raid GuideEureka Overview
The Forbidden Land: Eureka allows players to progress their character's power in many different ways, each serving to help the player in all Eureka zones.
These upgrades are not strictly required to clear the raid, but are generally recommended for players that plan to spend a lot of time in this series of Field Operations.
Logos Actions and Wisdoms
Logos Actions, first introduced in Eureka Pyros, allow the use of up to 2 specialised actions at any time that have various, powerful effects.
To obtain and equip them, players must first acquire the necessary Logograms. These can be dropped by mobs and Notorious Monster FATEs, found in Happy Bunny Lockboxes and also purchased off the Marketboard. Afterwards, players can speak with Drake to appraise them, and finally combine them at the Logos Manipulator to create the actions.
Wisdoms, also introduced in The Forbidden Land: Eureka Pyros are a subset of Logos Actions that passively boost certain stats, lasting until the player leaves the instance, changes jobs or dies.
To see a complete table of Logos Actions, along with their effects, recipes and Logogram acquisitions, please see the website below.
Logos Actions ListAethertight Flasks
Aethertight Flasks, introduced in Eureka Hydatos are items used to increase the amount of Logos Action slots available to the player.
Aethertight Flasks are only obtainable via Silver Happy Bunny Lockboxes in Eureka Hydatos, and each flask can be traded with the Expedition Alchemist up to 3 times for a maximum of 6 total Logos Action slots.
6th and 7th Magicites
Certain Notorious Monsters within both Eureka Pyros and Eureka Hydatos have a very rare chance to drop a unique material.
Players must obtain 1 of each unique material and speak with the Expedition Engineer located within each Field Operation to earn their 6th and 7th magicites. Players may also purchase these materials off the Marketboard.
Below is a table listing the name of the unique material and the Notorious Monster FATE it drops from.
| Pyros | Hydatos |
|---|---|
| Lamebrix's Dice (Thirty Whacks) | Molech's Horn (Bullheaded Berserker) |
| Ying Yang's Tissue (Haunter of the Dark) | Goldemar's Horn (Duty-free) |
| Skoll's Claw (Heavens' Warg) | Ceto's Claw (Stone-cold Killer) |
Cassie Earring, Blitzring and Optical Hat
Certain Notorious Monsters within Eureka Pagos have a very rare chance to drop a piece of gear that increases the player's Haste stat while in Eureka zones, with each point of Haste reducing the GCD's cooldown by an additive 1%.
Both the Cassie Earring and Blitzring are available as rare drops, whereas the Optical hat can be obtained by collecting an assortment of items across the zone, crafting them into a singular item and then completing the requisite FATE. All these items are also purchasable on the marketboard.
These items are extremely rare, expensive and optional for only a minor increase in damage (if the job directly benefits from faster GCDs). In the Optical Hat's case, it is outclassed by Elemental +2 headgear or Vermilion chestpieces due to the Elemental Bonus attached to both pieces, offering more raw offence and defence.
Elemental +2 Sets and Physeos Weapons
Elemental +2 Sets and Physeos Weapons are obtainable gear that offers substantial increases in universal offence and defence by increasing players' Elemental Bonus stat while in Eureka zones.
The Elemental sets are first available from Eureka Pyros, and require players to fulfill 2 conditions to unlock them for purchase from the Expedition Artisan:
- Obtain an Elemental stage relic weapon.
- Discover 50 Logos Actions.
The sets can then be augmented with the Expedition Artisan within Eureka Hydatos, first to +1 with Hydatos Crystals and finally to +2 with Eureka Fragments, obtained within The Baldesion Arsenal.
To upgrade a weapon to a Physeos Weapon, players must exchange both their Eureka stage relic weapon and 100 Eureka Fragments with Gerolt within Eureka Hydatos.
Kirin's and Vermilion Chestpieces
Kirin's and Vermilion chestpieces also offer a substantial increase in Elemental Bonus and Haste.
Kirin's and Vermilion chestpieces are available for exchange with the Nostalgic Fellow in Kugane using Cryptic Seals and Damascene Cloth respectively, both obtainable within The Baldesion Arsenal. Players may choose to also buy the armour, seals and cloths off the Marketboard or ask their local Field Operation groups for any handouts as they aren't used for much else.
Raid: The Baldesion Arsenal
WARNING
This guide will entail setups and strategies for an ANYPROG run, meaning that any player at any prog-point in the raid can join.
Depending on what type of run it is and who is running it, the assigned roles and Logos Actions in the raid can change considerably. Please confirm the roles and Logos Actions with the raid leader's linked resources and be sure to ask questions if any player is unsure.
Visual Guide
This visual guide details entry requirements, party and Logos Action setup, boss abilities and their potential callouts. The guide also features the trash mobs between each boss, trap zones and loot. While this guide isn't 100% accurate on boss timelines, it should give any player a general idea of the mechanics in any given fight.
Visual GuideEntry Requirments
Any player who is Elemental Level 60, has completed all available story objectives in Eureka Hydatos and has spoken with the Expedition Scholar can enter The Baldesion Arsenal.
To enter The Baldesion Arsenal, a minimum of 8 players must have met the above prerequisites to spawn the Umbral Turbulence weather and the following Notorious Monster FATE: I Don't Want to Believe.
I Don't Want to Believe
Dispel L is required to remove any personal buffs the Notorious Monster gives itself. Look for the cast  "Fluorescence".
Players can become  Aetherially Primed for 10 minutes after this FATE provided they fulfil the following conditions:
- They are Elemental Level 60 before the FATE concludes.
- They are within the FATE's boundaries when it concludes.
- They achieve a Gold Rating.
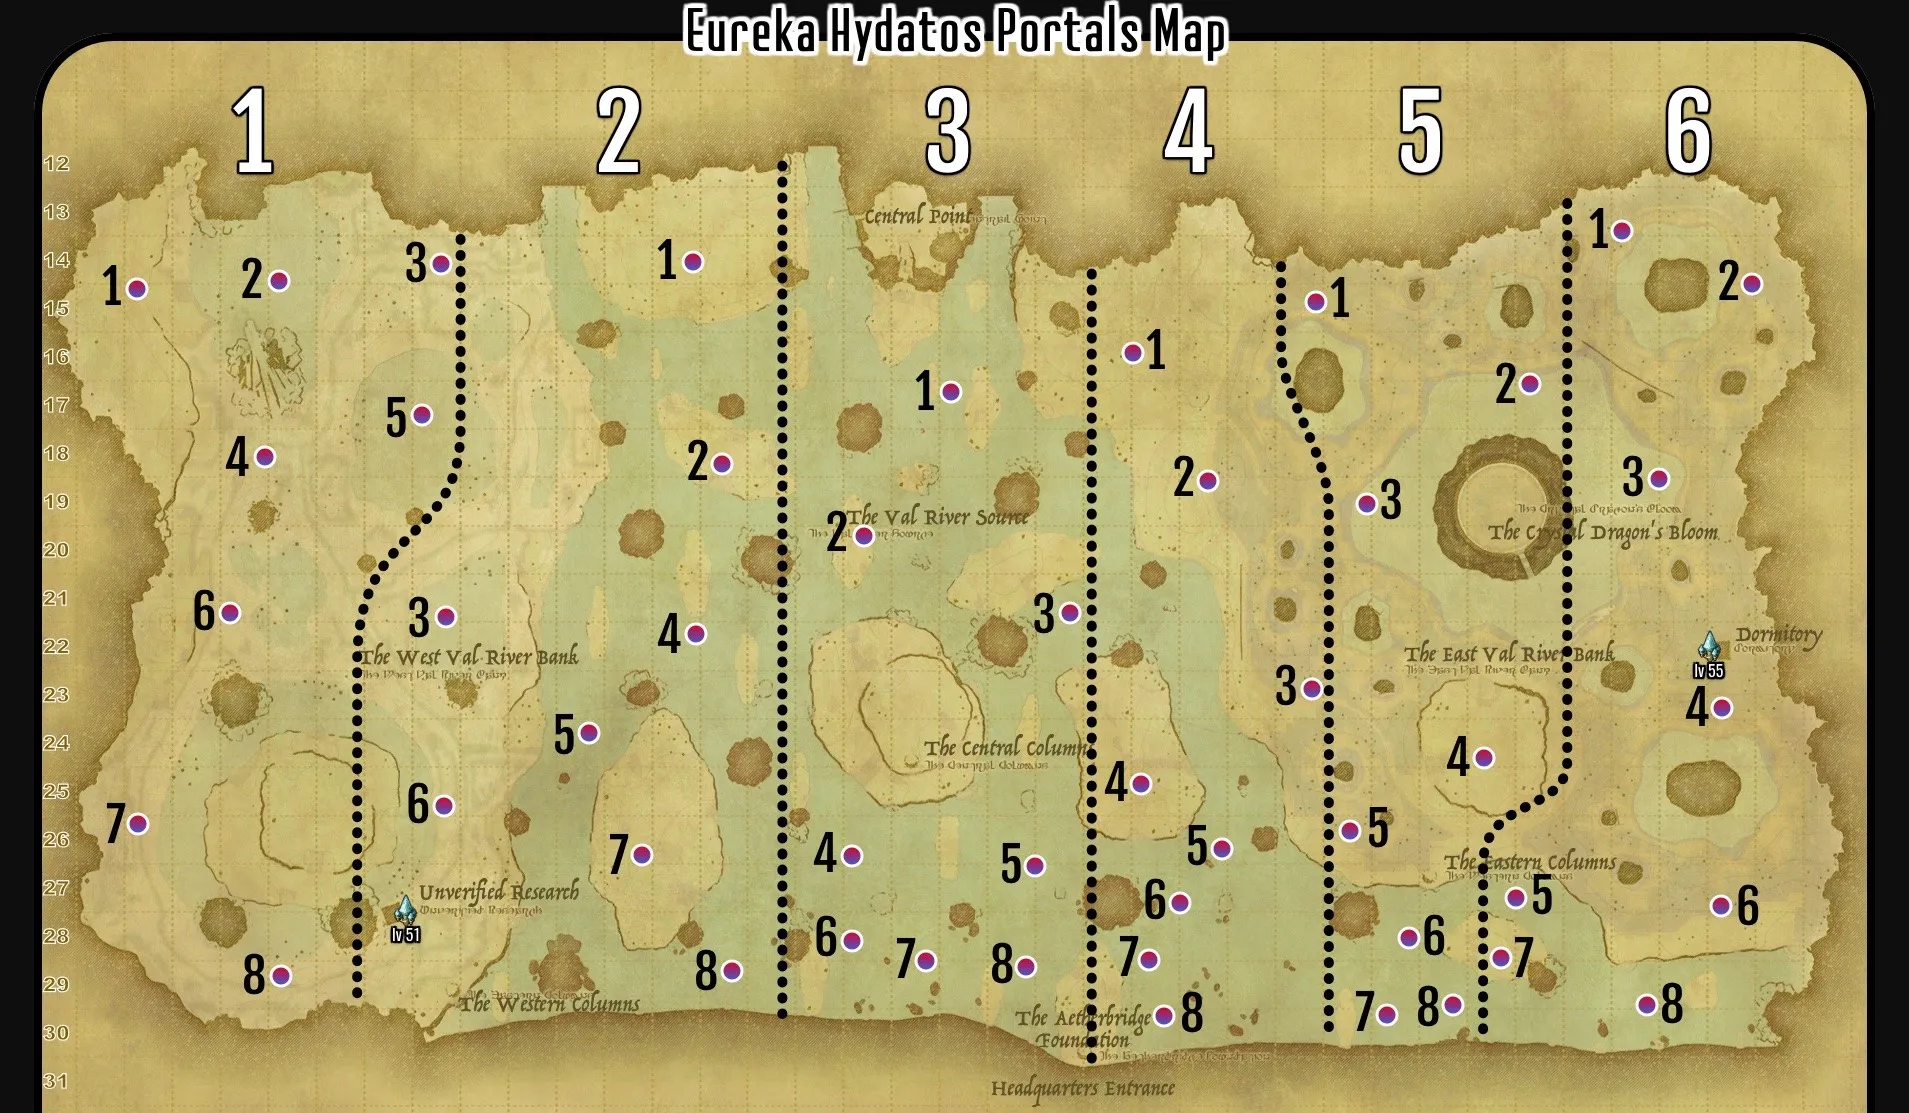
This buff allows players to access 1 of the 48 Aetheric Nodes scattered around Eureka Hydatos that spawn shortly after the FATE concludes. There are 2 kinds of Nodes that appear:
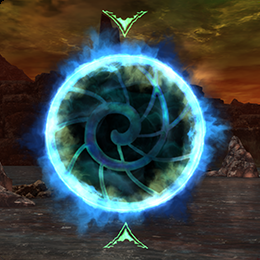
- Unstable Aetheric Nodes, spawning 3 minutes after the FATE concludes and blue in colour. Requires the buff and the use of an Aetheric Stabilizer to access.
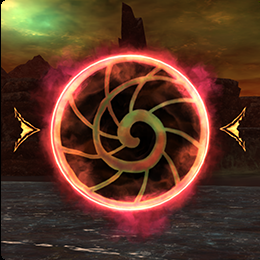
- Stable Aetheric Nodes, spawning 6 minutes after the FATE concludes and red in colour. These can be accessed by anyone with the buff.
| Unstable Aetheric Node | Stable Aetheric Node |
|---|---|
 |  |
Finding a Group
Two major communities support Field Operations in OCE, the Content Achievers Discord covers a wide variety of content beyond Field Operations, while the Murder of Geese (MOG) Discord focuses specifically on coordinating groups for raids in Field Operations.
Content Achievers DiscordMurder of Geese (MOG) DiscordSet Up
NOTE
The nature of Logos Actions allows players to take on other roles to cover any missing bases of tanking, healing and damage.
Logos Actions ListEach party should aim for:
x1 Tank
x2 Healers
x5 DPS
Extra tanks and healers are welcome should the whole raid not have enough players to clear comfortably healthy or need a safety net for Proto Ozma.
Additionally, everyone should have  Spirit of the Remembered active AT ALL TIMES, available from the Logos Action of the same name. It offers a 70% chance to be automatically revived upon death, a very useful tool to circumnavigate the
  restriction on standard raises. If it gets consumed, find a safe moment to refresh the buff, even during battle.
Depending on a player's role, it's useful to have certain Wisdoms active to further amplify their role in the raid, these are:
| Role | Wisdom |
|---|---|
 Tank Tank | For Tanking - Indomitable or Guardian For DPS - Martialist |
 Healer Healer | For Healing - Templar For DPS - Aetherweaver |
 Melee DPS Melee DPS | Duelist or Skirmisher |
 Phys. Ranged DPS Phys. Ranged DPS | Fiendhunter or Skirmisher |
 Caster DPS Caster DPS | Elder or Skirmisher |
Finally, at least a couple of DPS players should have the Logos Action Perception L to uncover any traps littered throughout the raid as well as the portal leading to the secret rooms.
Below are mini-guides and example loadouts for each role within The Baldesion Arsenal:
Encounters
Notable Trash Mobs
While trash mobs generally aren't very threatening, there are a few sprinkled throughout The Baldesion Arsenal with dangerous casts that we generally want to avoid or interrupt.
In general, all mobs should be pulled by a Tank with

 defensive Wisdoms and Magicite in the same slot as the element of the mob.
Below is a table noting some mobs and their dangerous casts, as well as a link to a more in-depth guide on the trash mobs.
| Enemy | Attack |
|---|---|
| Arsenal Poroggo | Toy Hammer - Deals 90% of a player's max HP. |
| Arsenal Byblos | Page Tear and Tail Cleave - An untelegraphed front and back conal AoE respectively. |
| Arsenal Calcabrina | Terrifying Glance - An untelegraphed frontal cone AoE that inflicts  Confused. Confused. |
| Arsenal Centaur | Berserk - Large damage buff to self. Dispel or interrupt the cast with  Sleep. Sleep. |
| Arsenal Sprite | Banish III - Small but heavy-hitting AoE that also removes a random buff from all players hit.  Stun or Interrupt. Stun or Interrupt. |
| Arsenal Strix | On the Properties of Darkness - Removes a random buff from any player affected. Stun or interrupt the cast with Sleep. |
Boss 1 - Art and Owain
Art and Owain are located in separate rooms and have no strict enrage, but they must both be engaged in combat at the same time and reach 1 HP to be defeated.
Art can be found through the West hallway and Owain can be found through the East hallway.
Art
Elemental Aspect
Art is an Earth-aspected boss.
Art is an Earth-aspected boss.
Art will begin the fight with the following sequence:
Thricecull - A tankbuster on the highest enmity target.
2 unique casts of Legendcarver and Legendspinner - A PB-AoE and Donut respectively.
Acallum no Senorach - A raidwide.
Mythcall - Summons 4 spears around the arena that mimic the Legendcarver or Legendspinner the boss uses.
Players should first dodge the original cast, then dodge that same attack from the spears.
Legendcarver or Legendspinner
Acallum no Senorach
Thricecull
Mythcall
Legendcarver or Legendspinner
From here, Art will enter a loop of attacks until it's defeated, adding in 3 new attacks to the fray:
- Legendary Geas - Targets a player with a telegraphed circle AoE and turns the floor black in colour.
Players moving while the floor is darkened will be inflicted with a
Bleed and
Heavy. This is followed by multiple line AoEs that become difficult to dodge for players with
- Pitfall and Glory Unearthed - The boss will jump away, creating a proximity AoE and targeting a random player with a large, chasing AoE.
- The targeted player must bait the AoEs away from both the party and the proximity AoE.
- Art will return at the centre of the proximity AoE.
- Piercing Dark - A targeted AoE on 2 players.
Owain
Elemental Aspect
Owain is both a Fire and Ice-aspected boss, changing over the course of the fight.
Owain will begin the fight with the following sequence:
Thricecull - A tankbuster on the highest enmity target.
Acallum no Senorach - A raidwide.
Mythcall - Summons 8 spears around the arena that become Fire or Ice-aspected in the following cast.
Elemental Shift - Owain shifts its own element and the spears around itself to either Fire or Ice.
Elemental Magicks - A telegraphed PB-AoE that also casts from any spears that are the same element as the boss.
Players should position at a spear of the opposite element to Owain.
Thricecull
Acallum no Senorach
Elemental Shift
Elemental Magicks
Thricecull
Spiritcull - 2 players are marked with a targeted AoE and several other players are marked with a prey marker.
Any player with a prey marker should pair up with another marked player.
Thricecull
From here, Owain will enter a loop of attacks until it's defeated, adding in 2 new attacks to the fray:
- Pitfall + Piercing Light - The boss will jump away, creating a proximity AoE where it lands and targeting 2 players with a targeted AoE.
- Owain will return at the centre of the proximity AoE.
- Hands - 2 Ivory Palms will spawn around the arena, tethering to a player. These adds will swiftly move towards the tethered player but freeze in place if being looked at by the tethered player. They also have a damage resistance buff that can be removed by being in close proximity of its tethered player.
Tethered players should look at their hand and move towards it to remove its buff, making sure not to touch it directly.
Everyone else can wait until the buff is removed before damaging them down.
Boss 2 - Raiden
Raiden also has no strict enrage but still has attacks that can instantly kill any players not paying attention.
Elemental Aspect
Raiden is a Lightning-aspected boss.
Raiden will begin the fight with the following sequence:
Spirits of the Fallen - A raidwide.
Shingan - A tankbuster on the highest enmity target.
Thundercall - Creates a wall along the outer edge of the arena that inflicts players with a
Bleed.Ame-no-Sakahoko - A massive untelegraphed PB-AoE centred on itself. Raiden will also perform a large backflip, landing a considerable distance behind where the boss is facing.
Whirling Zantetsuken - A massive untelegraphed donut AoE with the only safe spot being directly under its hitbox.
Raiden will then cycle through the following attacks until its HP falls below 70% or it has completed the cycle once:
- Spirits of the Fallen
- Ame-no-Sakahoko
- Whirling Zantetsuken
TANK
The Main Tank should position Raiden at the wall at the beginning of the fight so that the boss has ample space to backflip.
Upon the HP threshold being passed or the cycle completing, Raiden will disappear and reappear at the East or West of the arena, becoming untargetable and beginning the following sequence:
Lateral Zantetsuken + Ball Lightning - A half-room cleave AoE dictated by the direction its sword is pointing towards. In addition, Ball Lightning adds will spawn under players and begin casting Shock, a telegraphed PB-AoE.
All players should stack up in the middle after Raiden disappears and look for the boss on either side of the arena to watch the sword. When the AoEs appear, players can start running away from the half the sword is pointing towards.
Spirits of the Fallen
Lancing Bolt - 6 massive targeted AoEs on random players, spawning Streak Lightnings where each player was hit.
Streak Lightnings are Lightning aspected adds and render Raiden invulnerable while it casts its next attack.
Ultimate Zantetsuken - A hard enrage that wipes the party if the cast finishes.
All players must destroy the Streak Lightnings before Raiden can finish casting Ultimate Zantetsuken.
Spirits of the Fallen
Booming Lament - A large telegraphed AoE targeted on a player.
From here, Raiden will enter a loop of attacks until it's defeated, adding in 4 new attacks to the fray:
Cloud to Ground - Multiple exaflares spawn along a side of the arena.
Players can position in later-spawning lanes of exaflares, and then move into earlier-spawning lanes as the AoEs travel along the arena.
Bitter Barbs - Several players are tethered together and several other players are targeted with a small telegraphed AoE.
Tethered players must run away from each other to break the tether, keeping in mind that some exaflares are still travelling across the arena.
For Honor - An untelegraphed PB-AoE.
Levinwhorl - A heavy raidhwide.
Secret Rooms and Expedition Support
To remove Absolute Virtue's  buff and continue with the raid, players inside are required to spawn the Notorious Monster FATE: The Baldesion Arsenal: Expedition Support within Eureka Hydatos and players outside the raid are required to complete it.
To spawn it, players must first discover the secret rooms via a portal in one of the rooms before Absolute Virtue. The portal can be uncovered via the use of Perception L.
There are 6 secret rooms, each aspected to a unique element and each with a button that when all are simultaneously pressed, will do the following:
- Spawns the Notorious Monster FATE: The Baldesion Arsenal: Expedition Support.
- Lock the entrance to the room and spawn enemies that must be killed to unlock the entrance.
NOTE
Because the nature of the buff on Absolute Virtue only requires that the FATE be spawned and completed, players may opt to cheese a room instead. There are 2 available methods to cheese a room:
Use Return to exit the room AND the raid as a whole.
Log out. The doors will open and allow players outside the room to pull the mobs within.
Once all mobs within each room are defeated, a door will open leading back into Raiden's arena.
Players outside the raid will need to complete the FATE, becoming Aetherially Primed buff provided they fulfil the following conditions:
- They are Elemental Level 60 before the FATE concludes.
- They are within the FATE's boundaries when it concludes.
- They achieve a Gold Rating.
After the FATE, 8 Aetheric Nodes will appear around Eureka Hydatos, allowing addtional players to join the raid for the following encounters.
The Baldesion Arsenal: Expedition Support
Dispel L is required to remove any personal buffs the Notorious Monster gives itself. Look for the casts
 "Mighty Strikes" and
  "Shock Spikes".
Wind-aspected enemies have some slight innate evasion. Players can circumvent this via 2 Logos Actions:
 Feint L - Reduces an enemy's evasion.
- Spirit of the Remembered - Increases a player's accuracy.
Boss 3 - Absolute Virtue
Absolute Virtue is the third boss in The Baldesion Arsenal, with a hard enrage at 7:20.
Elemental Aspect
Absolute Virtue is a Wind-aspected boss.
Wind-aspected enemies have some slight innate evasion. Players can circumvent this via 2 Logos Actions:
- Feint L - Reduces an enemy's evasion.
- Spirit of the Remembered - Increases a player's accuracy.
Absolute Virtue begins with the opening sequence:
Meteor - A raidwide
Eidos - creates Light or Dark-aspected bracelets that surround its wrists, augmenting any future attacks that are of the same element. A buff based on the augmented element will also be visible on the boss.
Hostile Aspect - Several Light and Dark-aspected circle AoEs appear in the arena. The AoEs with the same element as the boss's bracelets will be augmented, suddenly growing in size before the cast finishes.
As long as players stand away from the augmented AoEs, the unaugmented AoEs will never grow in size.
Medusa Javelin - A wide telegraphed conal AoE targeted at a random player.
Eidos
Impact Stream - Splits the arena into a Light and Dark side. Getting hit by the augmented element will result in lethal damage.
Auroral Wind - A small AoE tankbuster.
Eidos
Hostile Aspect
Meteor
Turbulent Aether - Several random players are tethered to a Light or Dark orb, spawning with a puddle of the same element under each orb.
Tethered players must run and stand under a puddle of the opposite element to safely pop their orb.
Medusa Javelin
Auroral Wind
Meteor
Meteor
Absolute Virtue will then jump away, becoming untargetable and beginning the following sequence:
Explosive Impulse x3 - 3 proximity AoEs along the walls of the arena. Also spawns 3 clones of Absolute Virtue with active Light or Dark bracelets. These clones will each cast one Impact Stream.
Impact Stream
To identify which clone is casting Impact Stream, players can follow the cut down the middle to a clone.
Impact Stream
To identify which clone is casting Impact Stream, players can follow the cut down the middle to a clone.
Impact Stream
To identify which clone is casting Impact Stream, players can follow the cut down the middle to a clone.
Explosive Impulse - A proximity AoE targeted on a player.
Absolute Virtue will reappear at its location.
Medusa Javelin
Auroral Wind
From here, Absolute Virtue will enter a loop of attacks until it's defeated or it enrages at 7:20, adding in 1 new attack to the fray:
- Call Wyvern - Summons 2 Aern's Wynav adds, both are Lightning-aspected.
These must be killed before they cast Explosion, a heavy raidwide that also inflicts everyone with
 Damage Down.
Boss 4 - Proto Ozma
Proto Ozma is the final boss of The Baldesion Arsenal, constantly switching between forms that adjust both its auto attacks and available mechanics. It also has a hard enrage at 10:30.
Elemental Aspect
Proto Ozma is a Lignting-aspected boss.
Below is a table with every shape Proto Ozma can take, along with the attack it executes after changing shape and the type of auto attacks.
| Form | Form Shift | Auto Attacks |
|---|---|---|
 Sphere Sphere | Black Hole - Removes all players from the raid that aren't standing on any of the 6 buttons around the arena. Additionally, there must be at least 1 player on each button. | Highest enmity target of each platform. |
 Cube Cube | Flare Star - Donut AoE centred on Proto Ozma. | Line-AoE at the highest enmity target of each platform. |
 Pyramid Pyramid | Execration - Large Line-AoE down the platform. | Small circle AoE on a random player at the back half of each platform, inflicts a cleansable Bleed. |
 Star Star | Mourning Star - PB-AoE centred on Proto Ozma. | Stack AoE on a random player on each platform. |
Occasionally, an Ozmashade will appear at the back of each platform. Each Ozmashade will execute a Form Shift that requires players to avoid its attack on top of any existing mechanics that are happening.
Star (First Form Shift)
- Form Shift
- Auto Attacks
- Shooting Star - A small knockback originating from the centre of the platform.
Sphere
Form Shift
Auto Attacks
Cube
Form Shift
Auto Attacks
Orbs + Meteor (Stack) - 6 Orbs spawn around the arena and begin travelling clockwise, dealing heavy magic damage to all nearby players when detonated and exploding for heavy raidwide damage if not popped. Additionally, a random player on each platform is targeted with a stack AoE, inflicting all players hit with
 Magic Vulnerability Up.
Main Tanks should avoid the stack entirely, use all their mitigation and stand on the right side of their platform, popping any orbs travelling towards their platform.
- Everyone else should stack towards the front left of their platform to avoid hitting the
Main Tank with the
Magic Vulnerability.
Holy - A tiny knockback originating from Proto Ozma.
Ozmashade
Meteor (Stack) and Holy - A small stack AoE followed by the tiny knockback.
- Like before,
Main Tanks should avoid the Stack AoE to avoid the
Magic Vulnerability.
- Like before,
Pyramid
Form Shift
Auto Attacks
Acceleration Bomb - Players are marked with a
 debuff that begins counting down. Players must not be using any actions, including movement, when the timer reaches 0.
- Failing this mechanic deals 90% max HP damage to all nearby players, severely crippling the party against any upcoming attacks.
- It's recommended to step away from the party to resolve the , to cripple as little players as possible should the mechanic be failed.
Meteor (Proximity) - 2 players per platform for a total of 6 players are targeted with a placeable proximity AoE. Each proximity AoE also spawns an Arsenal Urolith, a Lightning-aspected add that players need to kill.
- 1 player should place their AoE at the back of the platform.
- 1 player should place their AoE at the button clockwise of their platform.
Ozmashade
Meteor (Stack) - A small stack AoE.
- The stack-AoE applies a Magic Vulnerability to all players hit.
Main Tanks should avoid the stack entirely to avoid the
Magic Vulnerability.
- The stack-AoE applies a
Star
Form Shift
Auto Attacks
Meteor (Proximity) - 2 players per platform for a total of 6 players are targeted with a placeable proximity AoE. Each proximity AoE also spawns an Arsenal Urolith, a Lightning-aspected add that players need to kill.
- 1 player should place their AoE at the back of the platform.
- 1 player should place their AoE at the button clockwise of their platform.
Shooting Star
Ozmashade
Shooting Star
Proto Ozma will continue to shift between forms until hard enraging at 10:30, shifting into Star form and casting a long-form version of Shooting Star that wipes the raid.
Defeating Proto Ozma completes The Baldesion Arsenal. Congratulations!
First-timers can speak with Krile after taking the exit to unlock the True Ending of The Forbidden Land: Eureka, as well as claim their Demi-Ozma mount from the Achievements window.